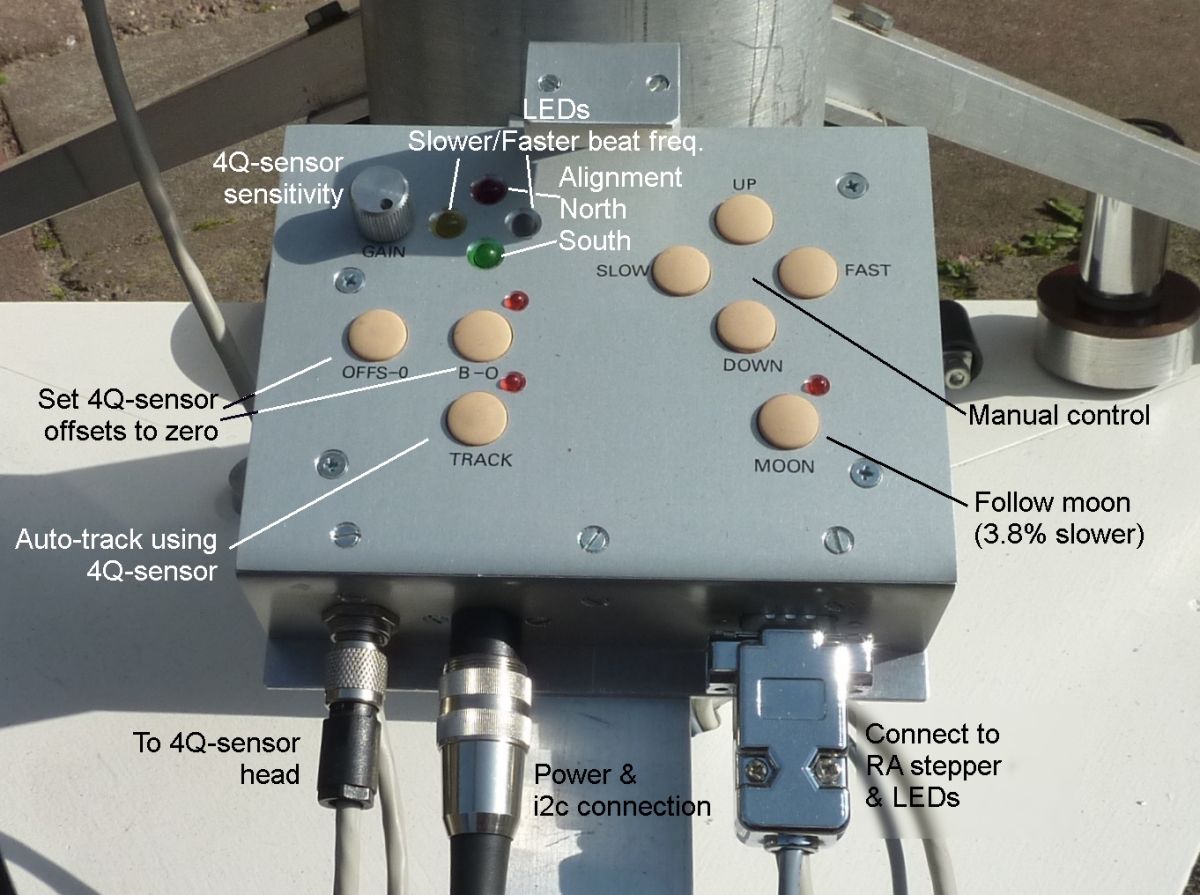
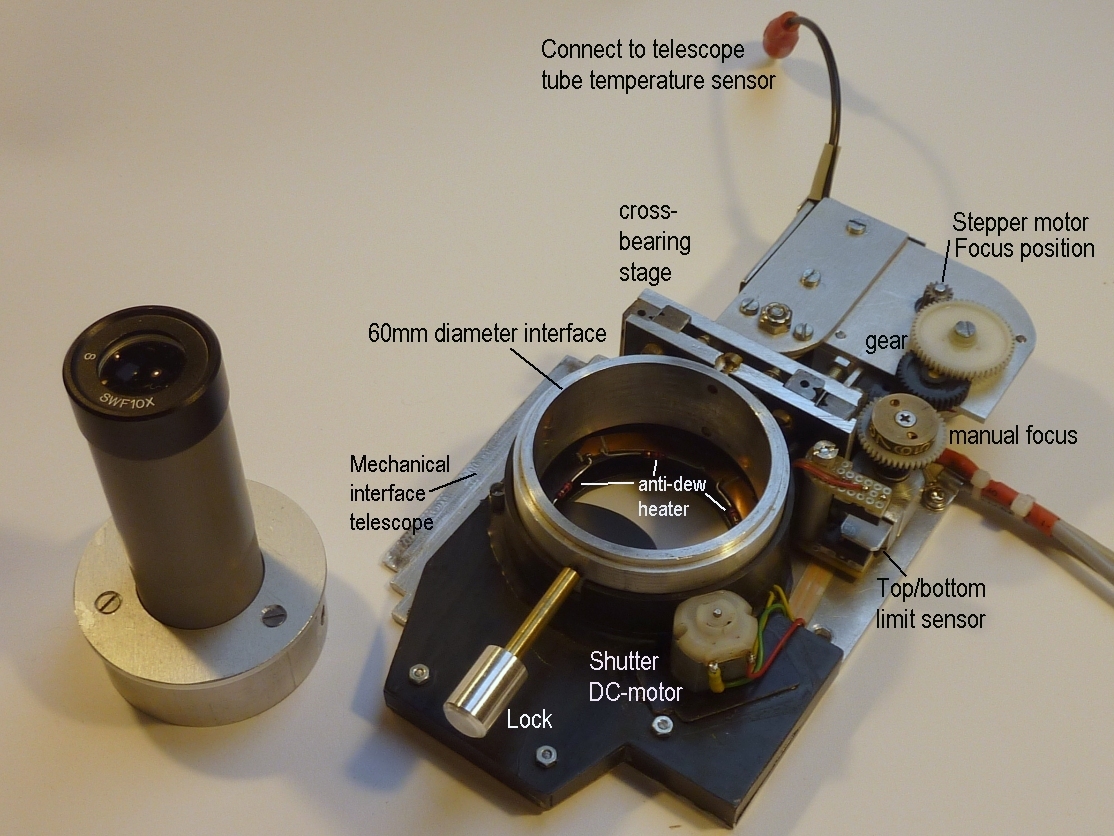
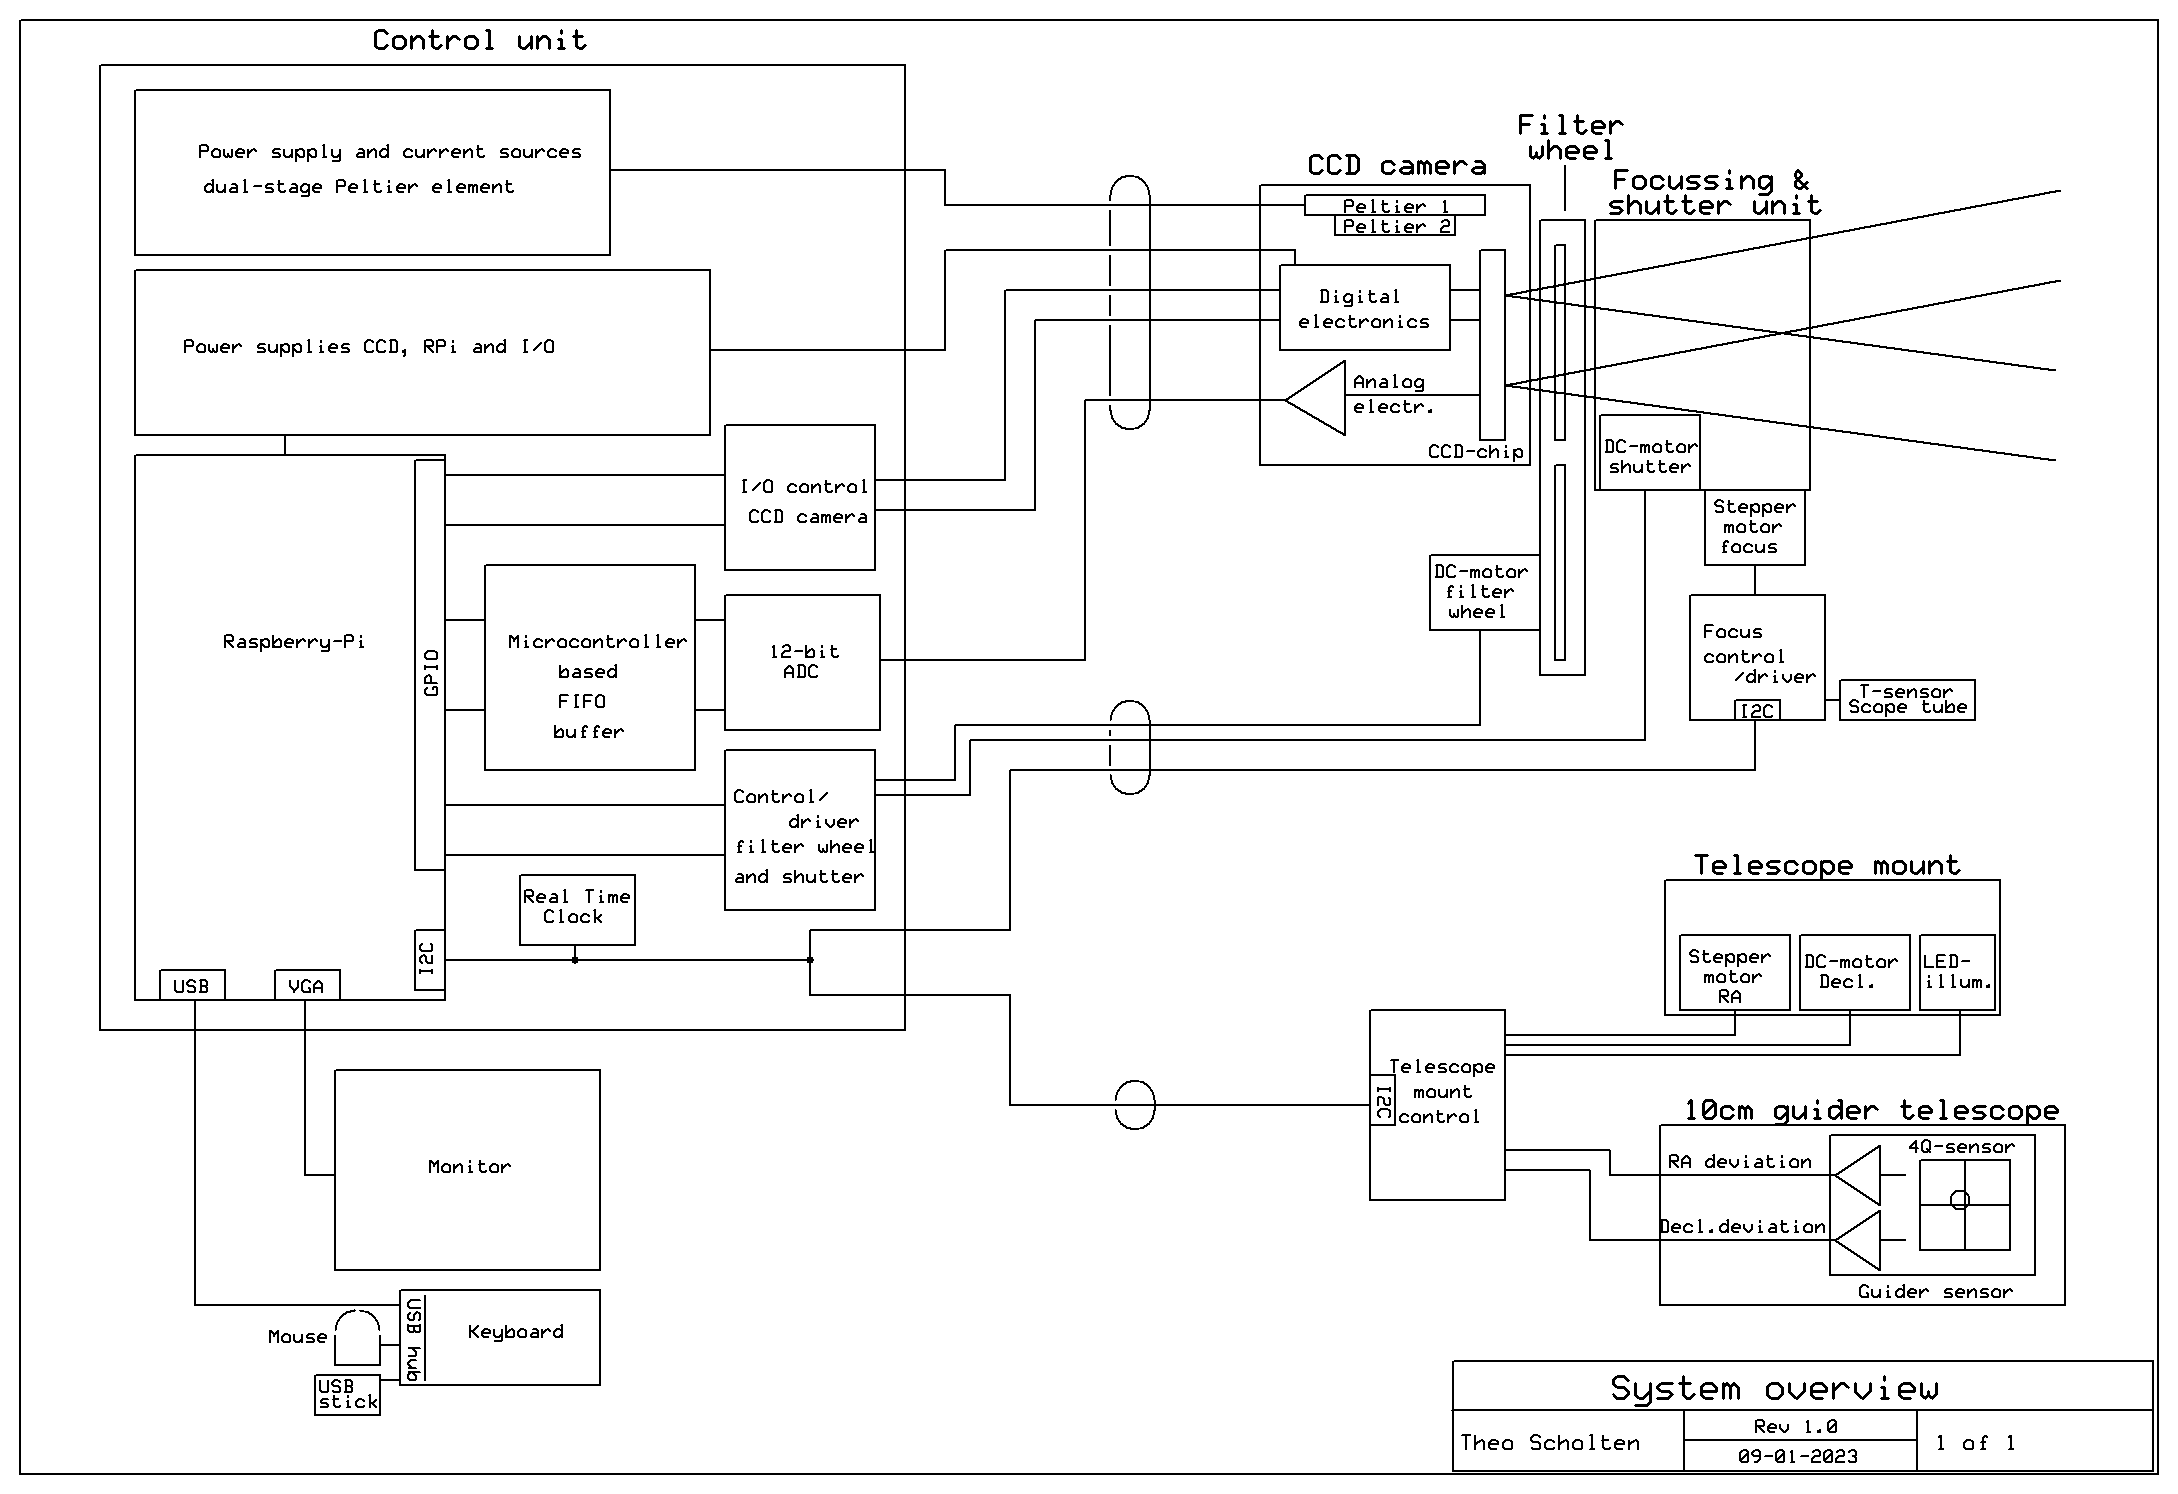
Up till the end of 2020 I worked with the outdated DOS-computers that were state-of-the-art when I set out for astrophotography with CCD's some 20+ years ago. The analog-to-digital converter was build on a board that only fitted an ISA-slot and the main image acquisition program, written in Borland Pascal, operated only under DOS. For continuity of my hobby, a new 'platform' was required and the Raspberry-Pi (RPi) was my choice. Since the Linux kernel of the RPi (at least the one I'm using) is not realtime, while my camera-electronics, once triggered, outputs the analog signal of the pixels in a continuous, uninterruptable flow, a FiFo-buffer was needed. An ATMega 1284p microcontroller with 16kbyte SRAM acts as buffer between the 12-bit ADC and the RPi. The interface with the CCD-camera remained functionally unchanged and a Serial-In Parallel-Out (SiPo) buffer was used to limit the number of GPIO lines required for controlling the camera. This SiPo is also used for controlling the shutter and filterwheel (via an additional micro-controller). The mount-controller and focusing unit are controlled via an i2c-connection. Here is an overview of all connected components and especially of the 'Control Unit' containing, amongst others, the Raspberry Pi (3B). |
 |
 |
 |
Qt Creator IDE, the free version for open source users, was selected for developing the main program in C++. An annotated screen shot is shown here. The program, amongst others, enables to:
|
| The following screen shots show the start-up menu, the help menu (mainly in Dutch), a menu to start automated acquisition and the resulting output: |
 |
 |
 |
 |
 |
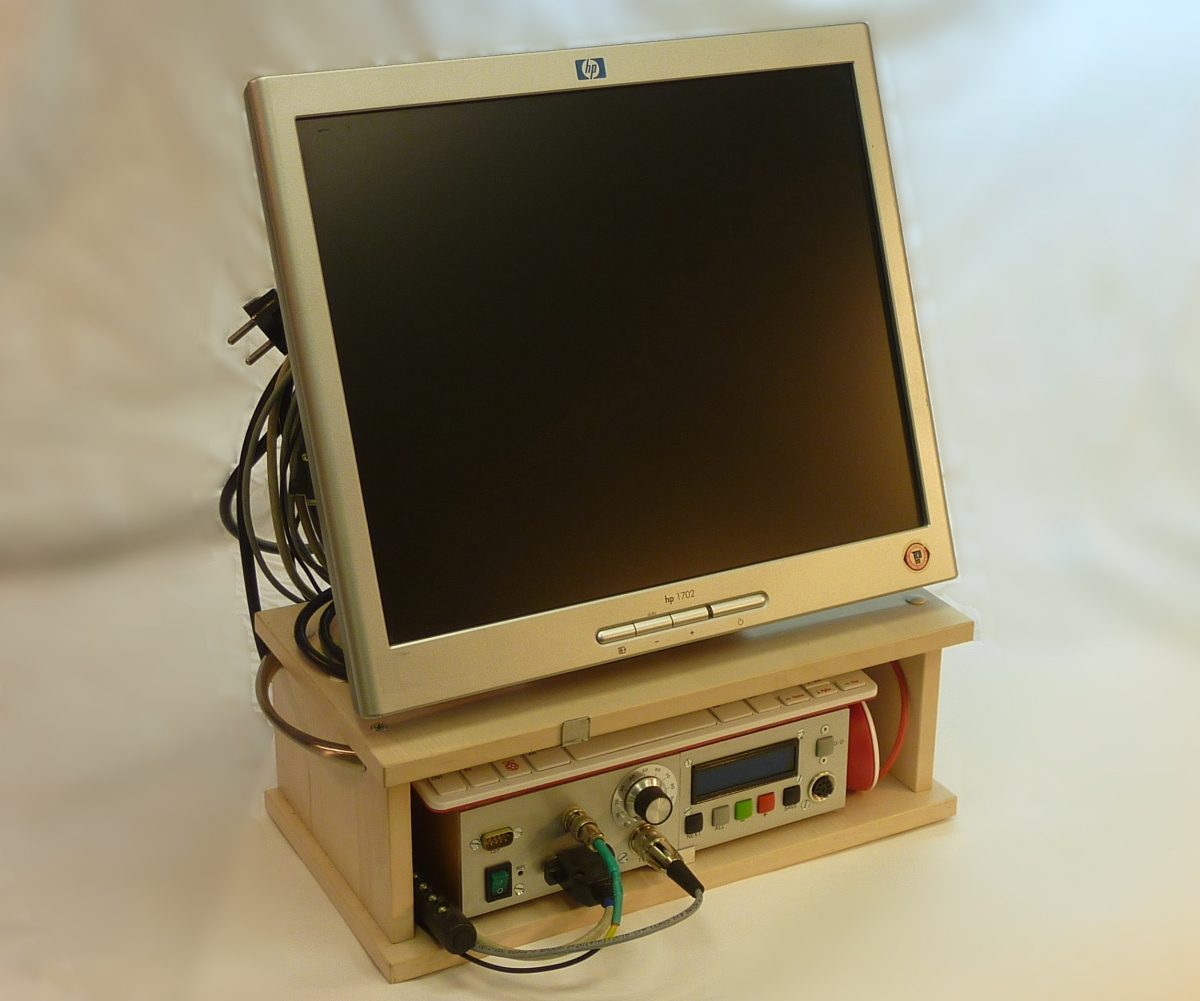 |
I combined the 'Control Unit' with an LCD-screen, key-board, mouse, and all cables one-sided attached, in one easily portable unit replacing the DOS-computer(s), separate power supplies and a myriad of cables. It also saves a lot of lugging with hardware and cables! |
| For the interested, the electronics of the 'Control Unit' is given here:
|